
Cut and Sew Sublimation vs Blank Sublimation: Which for Your Apparel Line?
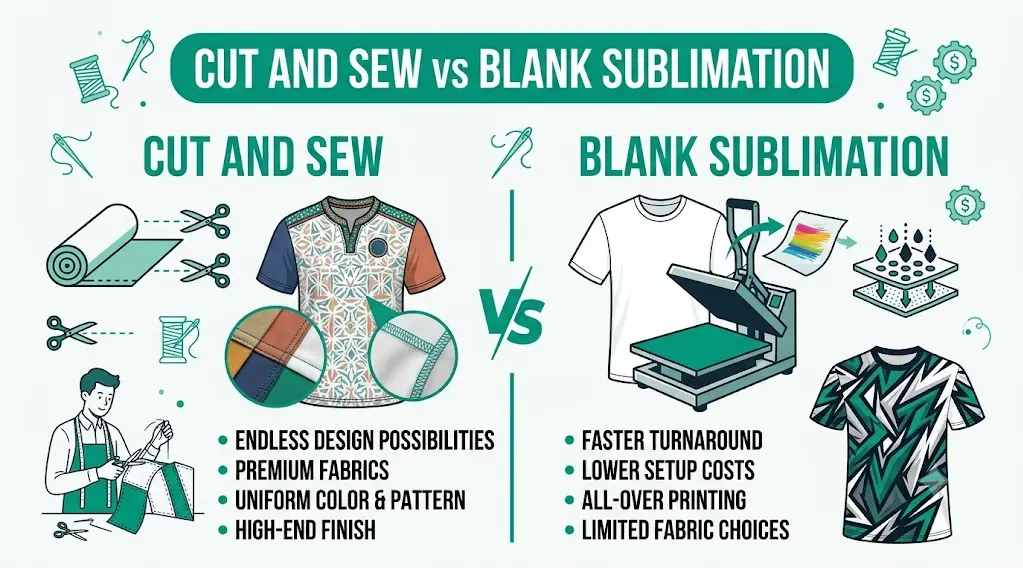
Two garments can carry the same all-over design and be built in opposite orders. Cut & sew sublimation prints the fabric first and constructs the garment after; blank pressing decorates a hoodie or tee that already exists. Same ink, same chemistry, completely different products.
If you’re building an apparel line, this is a supply-chain decision disguised as a printing one. It sets your minimums, your lead times, your unit cost, and how premium the finished piece looks on a rack. Here’s the full comparison.
How Cut and Sew Sublimation Works
The process runs in three stages, and the order is the whole point.
- Print: your design is laid out on a digital pattern and sublimated onto flat rolls of polyester fabric, every panel of the garment printed while the fabric is still yardage.
- Cut: the printed panels are cut along the pattern lines, with the artwork already aligned to each piece.
- Sew: panels are stitched into the finished garment, body, sleeves, hood, pockets, all carrying continuous print.
Because every panel is pressed flat before construction, there’s nowhere for fabric to fold and block the transfer. Coverage is genuinely seam-to-seam: inside the armpits, across pocket edges, up into the hood. Placement is exact, because the art was mapped to the pattern digitally.
The trade-off is that you’re not decorating a garment, you’re manufacturing one. That means patterns, sampling, factory minimums, and weeks of lead time. You’re operating like a sports clothing brand, because at this point you are one.
How Blank Pressing Works
Blank pressing flips the sequence: buy a finished poly garment, press your transfer onto it at 385–400°F for 45–60 seconds, done. No pattern-making, no factory, no minimums beyond the blanks in your cart.
The limitation is geometry. A finished garment can’t lie perfectly flat, so anywhere it folds, seams, armpits, pocket edges, the paper loses contact and leaves unprinted white lines. That’s the white creasing you see on cheap all-over-print garments.
Keep designs inside the flat zones (chest, back, sleeves) and pressed blanks look excellent. Chase full-bleed coverage on a pre-sewn garment and the seams will always tell on you.
Rule of thumb: if the design stops before the seams, press blanks. If the design must cross the seams, the garment has to be printed before it’s sewn, there’s no press technique that gets around it.
Side-by-Side Comparison for Apparel Brands
| Factor | Cut & sew production | Pressing finished blanks |
| Print coverage | True seam-to-seam, including hoods and pockets | Flat zones only; white gaps at seams and folds |
| Placement accuracy | Exact, art is mapped to the pattern digitally | Approximate; drifts with garment alignment |
| Perceived quality | Retail / streetwear grade | Promo to mid-market |
| Typical MOQ | 20–100 pieces per design at most factories | 1 piece |
| Lead time | 3–8 weeks including sampling | Same day to a few days |
| Unit cost | Higher, fabric, cutting, and sewing per unit | Lower, blank plus a press cycle |
| Customization depth | Fabric choice, fit, labels, trims, full private label | Whatever the blank manufacturer offers |
Notice that neither column wins outright. Blanks are faster and cheaper per experiment; factory production is deeper and better per garment. The right answer depends on where your line sits today, which is the last section of this guide.
The Sampling Process: What to Expect Before Production
No factory run starts without a sample, and you shouldn’t want it to. A standard sampling loop looks like this.
- Tech pack in: you submit artwork, measurements, fabric spec, and trim details. Good factories help you build this.
- First sample: 7–15 days for a sewn prototype, typically $30–$80 per piece, often credited back against your production order.
- Revision round: adjust color, fit, or print scale; budget one or two rounds, a week or so each.
- Approval and deposit: you sign off a golden sample, pay a deposit (commonly 30–50%), and production begins.
Color deserves special attention at this stage. Dye-sub output shifts between fabrics and printer profiles, so approve color from a physical sample, never a screen. The golden sample becomes your quality contract for the whole run.
Lead Times and MOQs: Planning Your Calendar
Domestic cut & sew shops typically deliver in 3–5 weeks after sample approval; overseas factories run 6–10 weeks plus freight. Add the sampling loop up front and a first-time production order realistically spans two to three months from artwork to inventory.
Minimums vary more than lead times. Boutique domestic shops start around 20–50 pieces per design; larger overseas factories want 100–300, though many will pool sizes within one design. Blanks, by contrast, ship from stock, which is why hybrid calendars work so well.
Plan drops accordingly: factory-made hero pieces ordered a season ahead, pressed blanks filling gaps and testing new designs in between. Missing a seasonal window because sampling ran long is the most common first-brand mistake we see.
Which Route Fits Your Brand’s Stage?
Testing ideas (0–50 sales/month): press blanks, full stop. Zero minimums let you trial ten designs for the cost of one factory sample, and same-week turnaround means you learn fast. Keep art inside flat zones and quality stays respectable.
Proven sellers (50–500/month): move your best two or three designs into factory production. You’ve de-risked the demand; now upgrade the product to seam-to-seam coverage, custom fit, and your own labels, and raise the price to match.
Established line (500+/month): factory production becomes your default and unit economics improve with every size of run. At this stage, negotiate fabric contracts and keep blanks around only for limited drops and event merch.
Ready to build? Our cut & sew manufacturing service handles printing, cutting, and sewing under one roof, with sampling support and MOQs designed for growing brands. Send us your designs and quantities for a bulk quote, or start smaller with pressed blanks from our wholesale catalog.
Conclusion
Pressing blanks is fast, cheap, and minimum-free, ideal for testing. Factory-printed panels deliver seam-to-seam coverage, exact placement, and retail quality at higher minimums and longer lead times. Match the method to your stage, and request a quote when you’re ready to scale.
FAQs
Why do all-over-print garments have white lines near the seams?
Those garments were pressed after sewing. Wherever the fabric folded or lifted, the transfer paper lost contact and left the fabric unprinted. Printing panels before construction is the only complete fix.
What MOQ should I expect for factory-made apparel?
Boutique domestic factories commonly start at 20–50 pieces per design; larger overseas operations want 100–300. Many pool sizes within a single design, and MOQs often drop once you become a repeat customer.
Is cut & sew production worth the higher unit cost?
Once a design is proven, usually yes. Seam-to-seam coverage and custom construction support a retail price 30–60% higher than a pressed blank, which typically more than covers the added manufacturing cost.
How long does a first production run take?
Budget two to three months end to end: a week or two for the tech pack and first sample, a revision round, then 3–10 weeks of production depending on the factory’s location. Reorders skip sampling and run much faster.